Testim gives you the ability to override timeouts within a test, outside a test and across a group of tests. This helps to control the amount of time tests need to wait before a particular condition is met; after which tests fail gracefully after the set timeout period expires. The different ways to handle timeouts are as follows-
Tip 1: Timeouts within a step
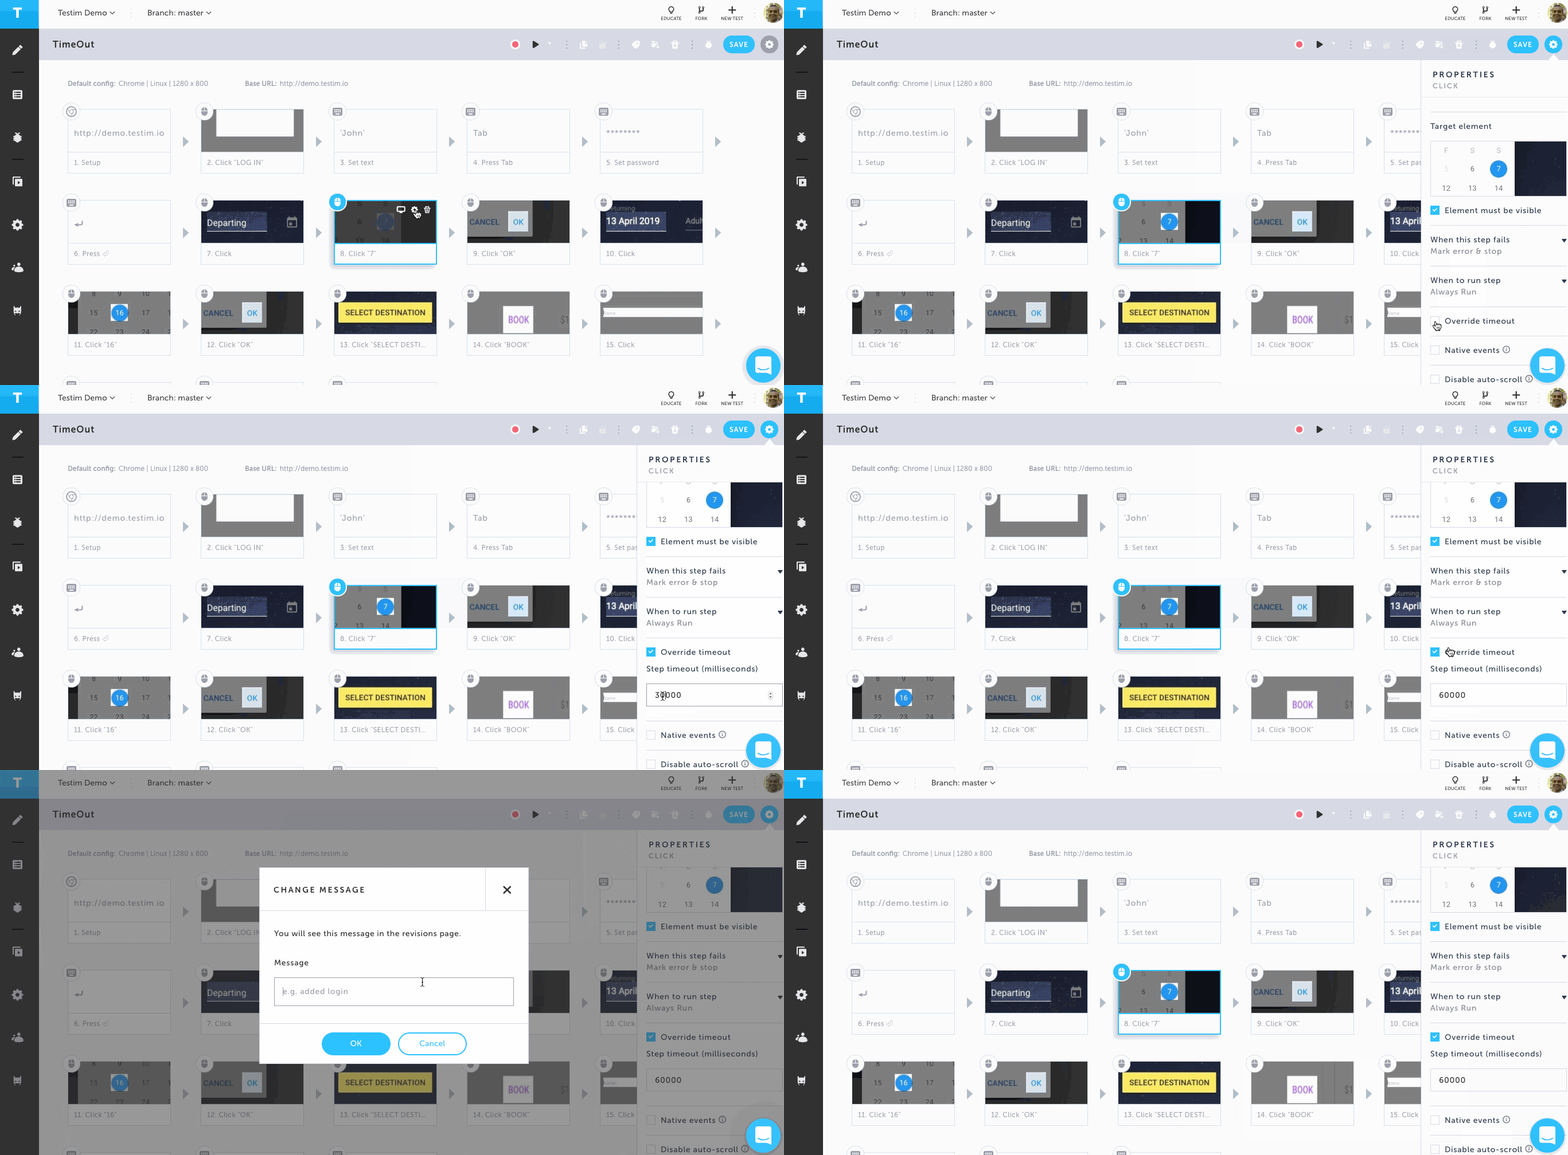
Every step you record in Testim has a default timeout value of 30 seconds. You can override this value by following the below steps
- Navigate to the properties panel of the step
- Select “Override timeout” option
- Change the default timeout value from 30 seconds to the desired timeout value
- Click on Save

Tip 2: Timeouts within Test Configs
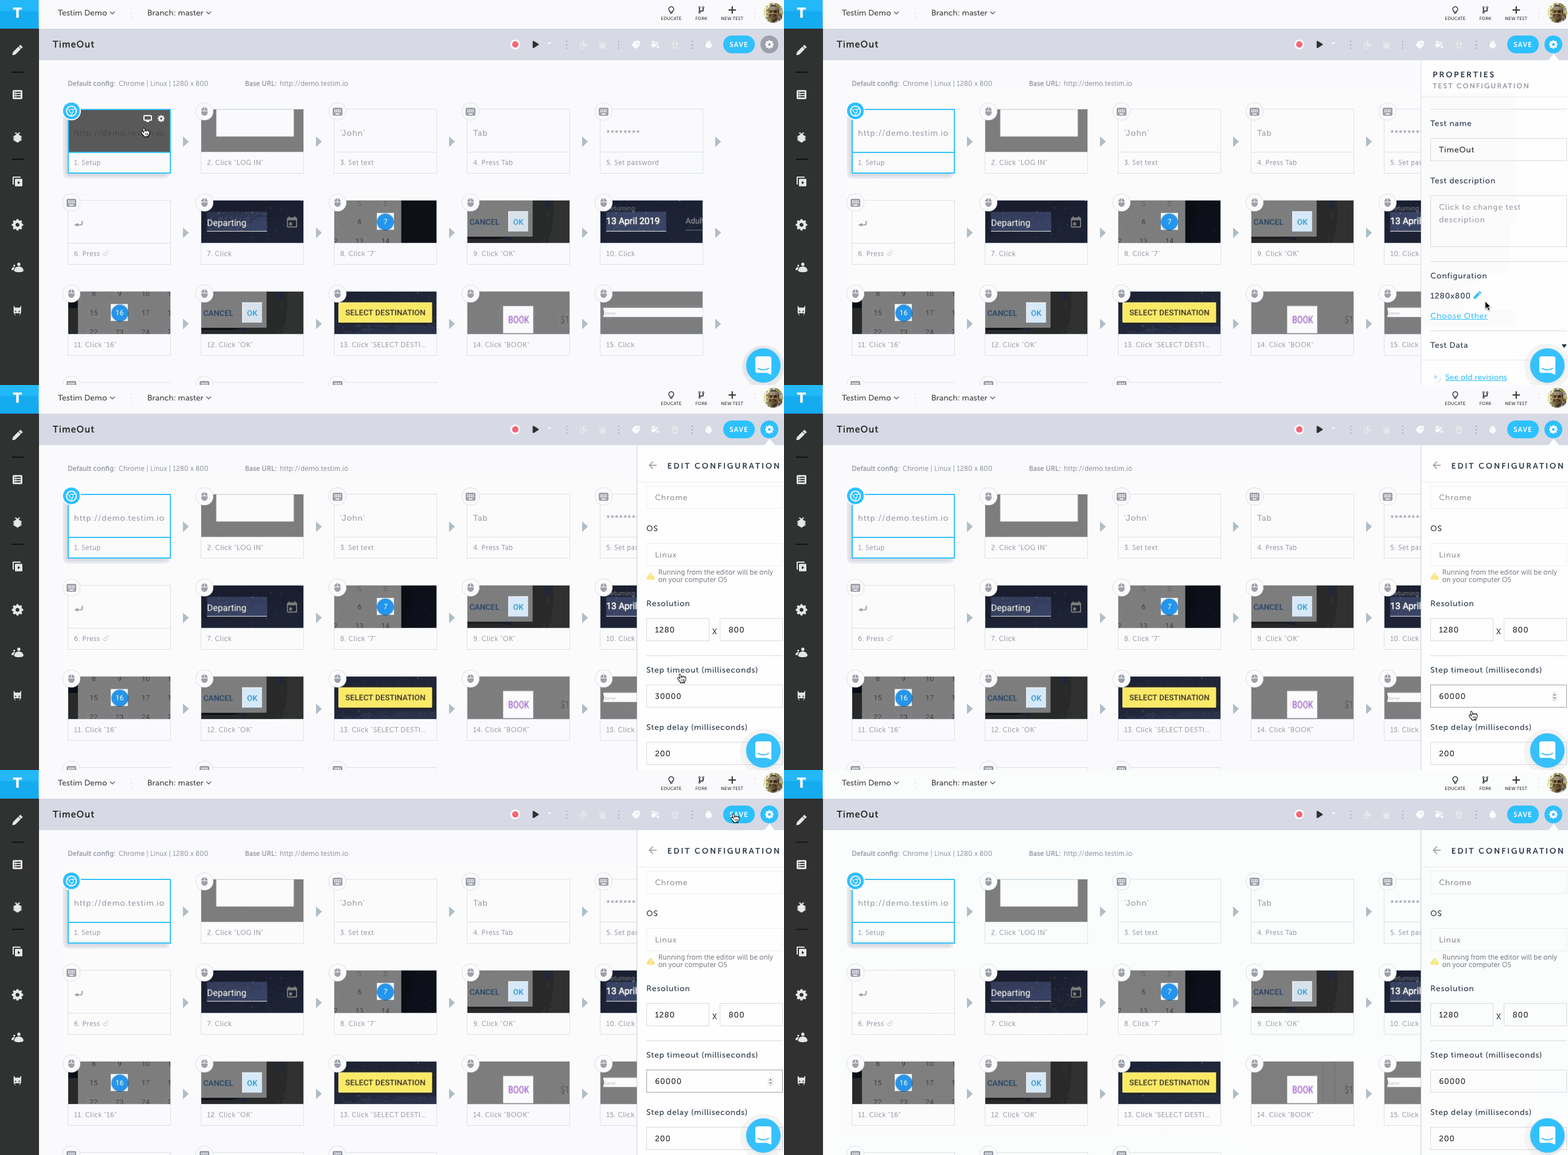
You have the ability to change the timeout for all the tests using a particular test config. You can do this by following the below steps-
- Navigate to the properties panel of the setup step (first step in the test)
- Click on the edit config icon next to the exiting resolution
- Change the default timeout value from 30 seconds to the desired timeout value
- Click on Save
NOTE: You can also edit the Step delay value in the edit config screen

Tip 3: Setting timeout for test runs
To abort a test run after a certain timeout has elapsed, you can use the CLI –timeout command. The default value is set to 10 minutes.
Usage example:
npm i -g @testim/testim-cli && testim –token “eyJ0eXAiOiJKV1QiLCJhbGciOiJIUzI1NiJ” –project “vZDyQTfE” –grid “Testim-grid” –timeout 120000.
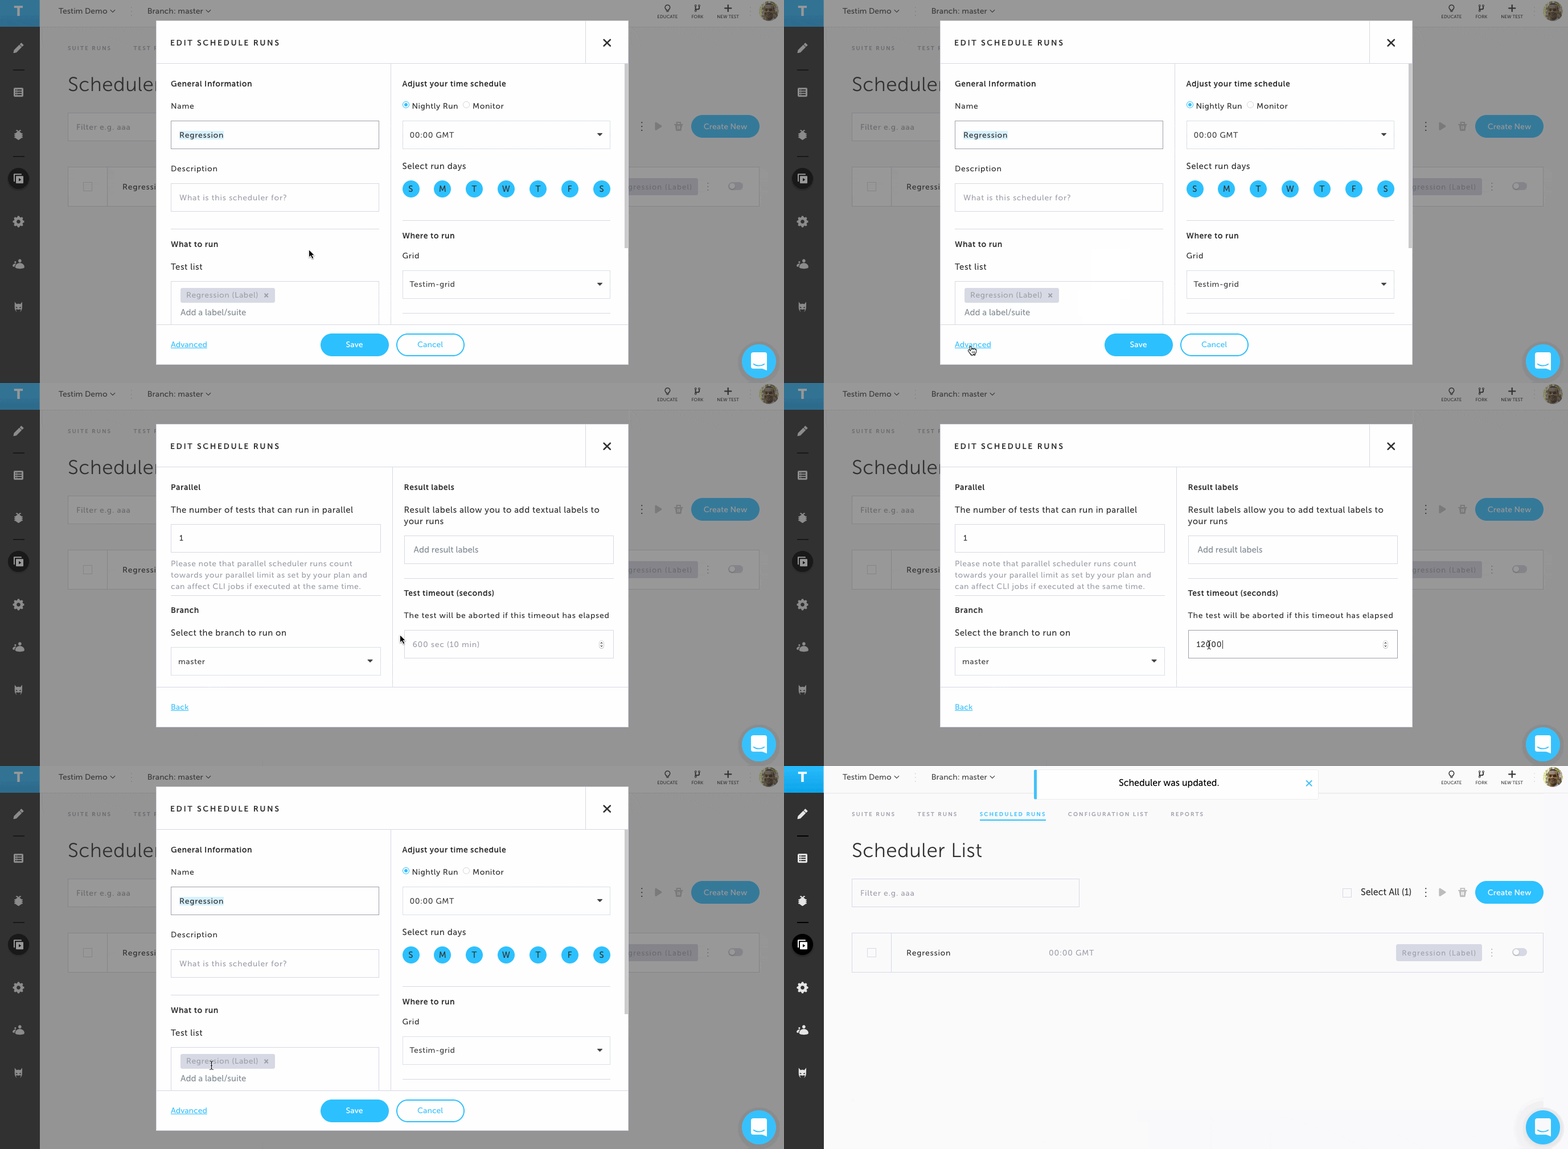
This timeout value can also be set in the Advanced Scheduler screen as shown below


