To build a mobile app that will thrive in the marketplace, it’s essential to perform end-to-end (E2E) testing before deploying to production. Simulating user behavior during E2E testing is critical to satisfying end users. With a proper testing strategy in place, you can avoid the defects and flakiness users sometimes experience in mobile apps. Detox, a test automation framework that’s especially useful for apps built with React Native, is one tool that automates E2E tests in mobile apps.
In this post, we’ll examine the Detox test framework in detail and how to use it when testing your React Native mobile app. This guide also takes you through an example of how to set up and execute tests with Detox step by step. But first, let’s review the link between Detox and mobile testing, and what the existence of Detox means for testing in React Native.
Expand Your Test Coverage
What is Detox in mobile testing?
As consumer demand for great user experiences continues to rise, it’s of utmost importance to ensure that apps work as expected.
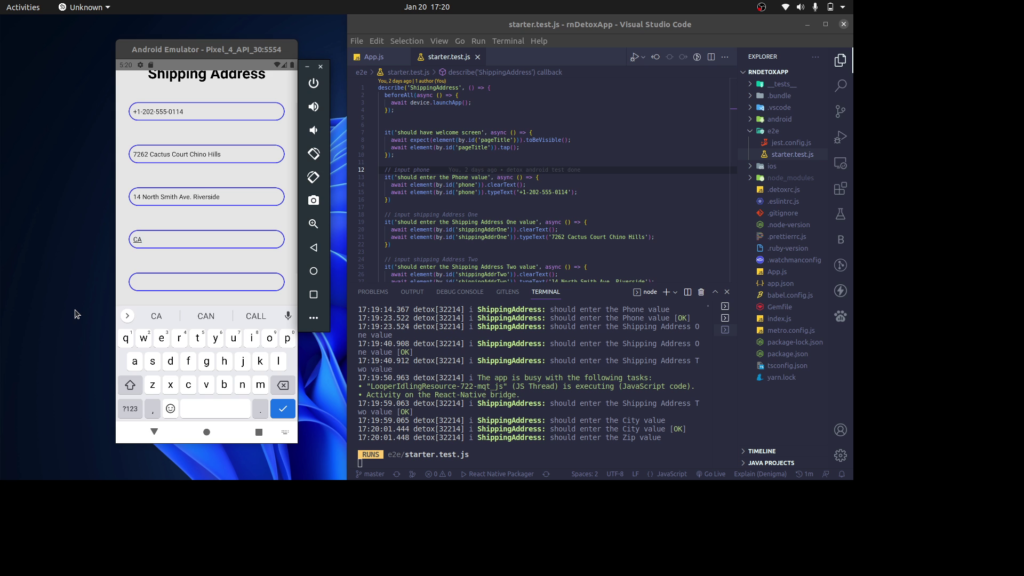
For example, suppose you’re testing an e-commerce app and its requirement to have users correctly fill in the shipping address. As a developer or tester, you’ll want to cover each case related to interacting with the form fields, detect flakiness, and ascertain that users can submit when the flow is complete.
Interaction between components during an E2E test can reveal obstructive behaviors that users could experience. With this in mind, the Detox test framework provides a solid foundation for writing and implementing test cases for React Native apps. Detox test suites can be written for multi-platform apps from a single codebase to be tested using an emulator (Android devices) or simulator (iOS devices). Additionally, you can perform an E2E test in Detox to validate the functionalities and connections that exist between the different parts of the app.
What is Detox in React Native?
Detox was created to mitigate the obstacles of automated E2E tests for mobile apps built with React Native. A cross-platform test engine, Detox is one of the most sophisticated tools in the mobile development ecosystem because it can be used to perform automated tests on both iOS and Android apps built with React Native.
Other benefits Detox brings to the table include:
- Compatibility with any test runner, including Mocha, Jest, and Cucumber
- Wide range of support and a buzzing developer ecosystem
- Easy set-up
- Ability to imitate actions and clicks visually in the app from a user’s point of view
- Provides tons of APIs for enabling triggers and action in your test suites
- E2E tests you write in Detox can also be executed on a continuous integration platform
With Detox, you can access, select, and trigger actions on elements within the app. This is similar to users interacting with the mobile app.
So, now that you know more about the Detox test framework, let’s see it in action.
Create the demo application
We need to start by creating a React Native project. Create a new React Native app using the following command:
npx react-native init rnDetoxApp
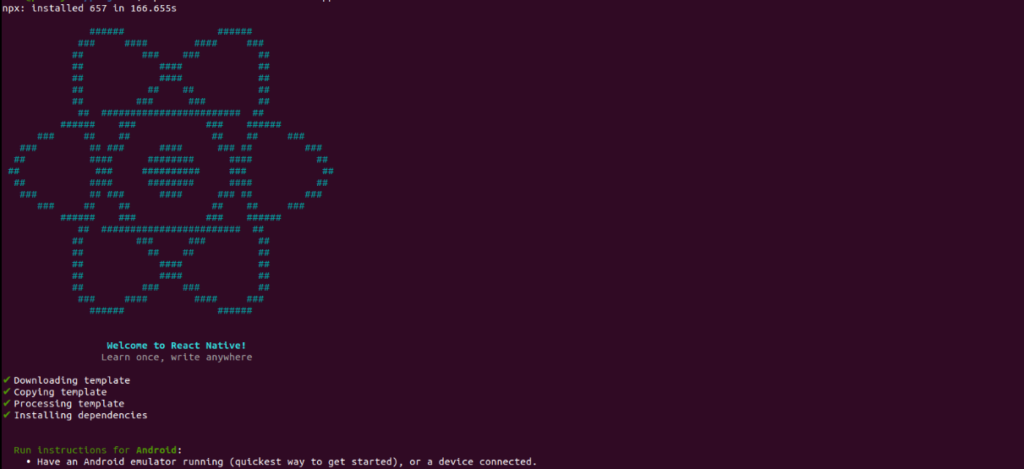
Your terminal will display the following screen after successful installation:

The next step is to build and launch the app in an emulator. From the terminal, navigate to the project folder cd rnDetoxApp.
Afterward, start the app using this command:
yarn start
Next, run the following command to build the app:
npx react-native run-android
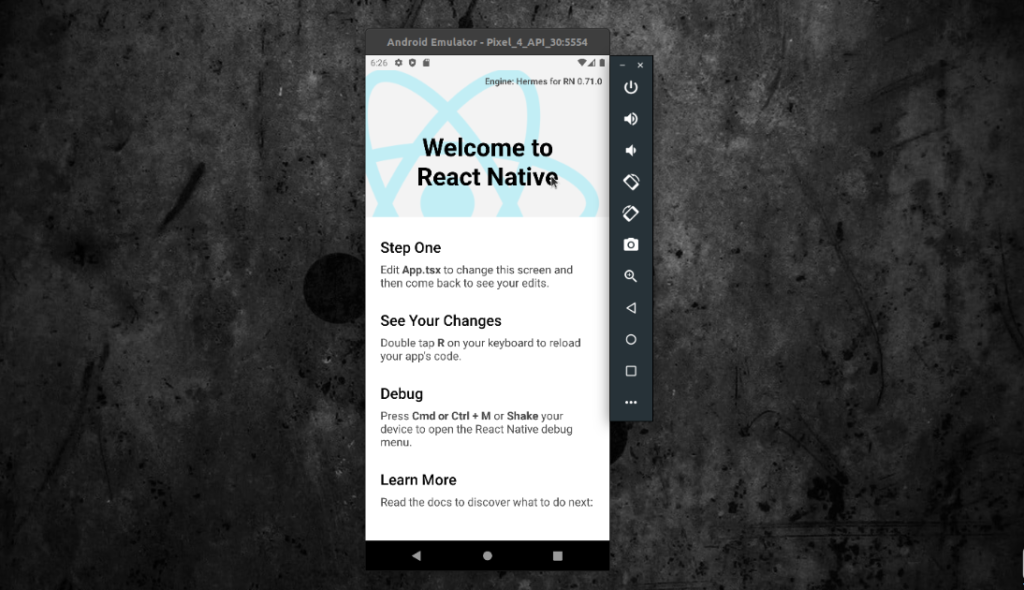
This is the screen that should appear when the command above runs successfully:

Configure Detox in React Native
Now that our React Native app is set up, we need to configure Detox. Note that the configuration targets Android devices.
The first step is to install a couple of packages locally and globally on your system:
- Install the detox-cli with the command yarn global add detox-cli.
- Install the test runner in the rnDetoxApp, yarn add “jest@^29” –dev.
- Also, add Detox as a dev dependency to your project with the command yarn add detox –dev.
Initialize Detox
Initialize the Detox test framework in your project using the command npx detox init:
npx detox init

Created a file at path: .detoxrc.js
Created a file at path: e2e/jest.config.js
Created a file at path: e2e/starter.test.js
In the .detoxrc.js file, you’ll have to set the value for your avdName:
  devices: {
    //... code omitted for brevity
    },
    emulator: {
      type: 'android.emulator',
      device: {
        avdName: 'Pixel_4_API_30'
      }
    }
  },
In the code above, Pixel_4_API_30 is the value for avdName. This instructs the Detox engine which type of Android device to use.
Add native configurations
In this step, you’ll be adding native dependencies as required by Detox.
Notably, in your project, you’ll observe an Android folder. In the Android folder, there’s a build.gradle file. Update the file with these changes.
First, in the ext option, add the kotlinVersion:
buildScript {

      ext {

       //...code omitted for brevity

       kotlinVersion = '1.7.20' // (1) add kotlinVersion

   }

//...code omitted for brevity

}
Second, update the repositories option found in the buildScript:
buildScript {
      //... code omitted for brevity
      repositories {
         google()
         mavenCentral()
         maven { url("$rootDir/../node_modules/detox/Detox-android") // add this dependency from detox
 }
   //... code omitted for brevity
}

}
Third, in the dependencies option add the following:
buildScript {
   dependencies {

      classpath("org.jetbrains.kotlin:kotlin-gradle-plugin:$kotlinVersion") // add this dependency here
      //...code omitted for brevity
      }
}
Now, inside build.gradle paste the allrepositories options below the buildScript options:
// make sure to add this to the file
allprojects{
       repositories {
       google()
       mavenCentral()
       maven {
          url("$rootDir/../node_modules/detox/Detox-android")
           }
       }
}
Afterward, in the android/app/build.gradle file, add these changes.
For the defaultConfig properties, add this code:
 defaultConfig {
        //...code omitted for brevity
        testBuildType System.getProperty('testBuildType', 'debug')
        testInstrumentationRunner 'androidx.test.runner.AndroidJUnitRunner'
    }
Still in the android/app/build.gradle, update the release option:
  buildTypes {
        //... code omitted for brevity
        release {
            //...code omitted
            proguardFiles getDefaultProguardFile("proguard-android.txt"), "proguard-rules.pro"
            proguardFile "${rootProject.projectDir}/../node_modules/detox/android/detox/proguard-rules-app.pro"
        }
    }
Also, while in the android/app/build.gradle, add this value to the dependencies field:
dependencies {
    androidTestImplementation('com.wix:detox:+')
    implementation 'androidx.appcompat:appcompat:1.1.0'
    //...code omitted for brevity
}
After that, create the file android/app/src/androidTest/java/com/rndetoxapp/DetoxTest.java.
Inside the DetoxText.java file, paste the code below:
package com.rndetoxapp;

import com.wix.detox.Detox;
import com.wix.detox.config.DetoxConfig;

import org.junit.Rule;
import org.junit.Test;
import org.junit.runner.RunWith;

import androidx.test.ext.junit.runners.AndroidJUnit4;
import androidx.test.filters.LargeTest;
import androidx.test.rule.ActivityTestRule;

@RunWith(AndroidJUnit4.class)
@LargeTest
public class DetoxTest {
    @Rule
    public ActivityTestRule<MainActivity> mActivityRule = new ActivityTestRule<>(MainActivity.class, false, false);

    @Test
    public void runDetoxTests() {
        DetoxConfig detoxConfig = new DetoxConfig();
        detoxConfig.idlePolicyConfig.masterTimeoutSec = 90;
        detoxConfig.idlePolicyConfig.idleResourceTimeoutSec = 60;
        detoxConfig.rnContextLoadTimeoutSec = (BuildConfig.DEBUG ? 180 : 60);

        Detox.runTests(mActivityRule, detoxConfig);
    }
}
The next thing is to create android/app/src/main/res/xml/network_security_config.xml file. Inside the network_security_config.xml file, paste the following code:
<?xml version="1.0" encoding="utf-8"?>
<network-security-config>
    <domain-config cleartextTrafficPermitted="true">
        <domain includeSubdomains="true">10.0.2.2</domain>
        <domain includeSubdomains="true">localhost</domain>
    </domain-config>
</network-security-config>
Afterward, you’ll have to link the network_security_config.xml file inside the android/app/src/main/AndroidManifest.xml. So, in your main AndroidManifest.xml, which already exists in your project, update this line of code:
 <manifest>
   <application
   ...code omitted
   android:networkSecurityConfig="@xml/network_security_config">
   </application>
 </manifest>
Add functionalities to the application
Before building the app, in your App.js file, update the code with this:
import React, { useState } from 'react';
import {
  View,
  StyleSheet,
  Text,
  StatusBar,
  TextInput,
  Pressable,
  ScrollView,
} from 'react-native';

const App = () => {
  const [phone, setPhone] = useState('Phone');
  const [shippingAddrOne, setShippingAddrOne] = useState('Shipping Address 1');
  const [shippingAddrTwo, setShippingAddrTwo] = useState('Shipping Address 2');
  const [city, setCity] = useState('City');
  const [zipCode, setZipCode] = useState("Zip Code");
  const [isSubmitted, setIsSubmitted] = useState(false);

  const onSubmit = () => {
    setIsSubmitted(true);
  };

  return (
    <ScrollView style={styles.container} testID='scrollView'>
      <StatusBar barStyle="dark-content" />
      <View style={styles.header}>
        <Text testID="pageTitle" style={styles.pageTitle}>
          Shipping Address
        </Text>
      </View>

      <View style={styles.content}>
        <TextInput
          testID={'phone'}
          style={styles.input}
          onChangeText={setPhone}
          value={phone}
        />
      </View>

      <View style={styles.content}>
        <TextInput
          testID={'shippingAddrOne'}
          style={styles.input}
          onChangeText={setShippingAddrOne}
          value={shippingAddrOne}
        />
      </View>

      <View style={styles.content}>
        <TextInput
          testID={'shippingAddrTwo'}
          style={styles.input}
          onChangeText={setShippingAddrTwo}
          value={shippingAddrTwo}
        />
      </View>

      <View style={styles.content}>
        <TextInput
          testID={'city'}
          style={styles.input}
          onChangeText={setCity}
          value={city}
        />
      </View>


      <View style={styles.content}>
        <TextInput
          testID={'zipCode'}
          style={styles.input}
          onChangeText={setZipCode}
          value={zipCode}
        />
      </View>

      {isSubmitted && (
        <View style={styles.message}>
          <Text>isSubmitted Successfully</Text>
        </View>
      )}

      <View style={styles.btnContainer}>
        <Pressable
          onPress={onSubmit}
          style={styles.pressable}
          testID={'submitButton'}>
          <View style={styles.btnTextWrapper}>
            <Text style={styles.btnText}>Submit</Text>
          </View>
        </Pressable>
      </View>
    </ScrollView>
  );
};

const styles = StyleSheet.create({
  container: {
    flex: 1,
    backgroundColor: '#E5E5E5',
  },
  header: {
    paddingTop: 80,
    justifyContent: 'center',
    alignItems: 'center',
    marginBottom: 16,
  },

  pageTitle: {
    fontSize: 32,
    fontWeight: 'bold',
    color: '#000000'
  },

  optionText: {
    fontSize: 20,
    color: 'gray',
  },
  content: {
    justifyContent: 'space-between',
    paddingHorizontal: 16,
    paddingVertical: 4,
    backgroundColor: '#E5E5E5',
    marginVertical: 10,
  },
  input: {
    height: 40,
    margin: 12,
    borderWidth: 2,
    borderRadius: 50,
    padding: 10,
    borderColor: '#3C48FC',
  },
  label: {
    fontSize: 20,
    marginBottom: 1,
    marginLeft: 5,
    color: 'gray',
  },
  message: { justifyContent: 'center', alignItems: 'center' },
  btnContainer: {
    justifyContent: 'center',
    marginTop: 52,
    paddingHorizontal: 16,
  },
  pressable: {
    borderWidth: 0,
    flexDirection: 'row',
    alignItems: 'center',
    justifyContent: 'center',
    borderRadius: 4,
    width: '100%',
    height: 48,
    backgroundColor: '#3C48FC',
  },
  btnTextWrapper: { justifyContent: 'center', alignItems: 'center' },
  btnText: {
    fontWeight: 'bold',
    fontSize: 16,
    lineHeight: 24,
    color: 'white',
  },
});

export default App;
The code above does the following:
- Input field to the user’s shipping address
- A message is shown when the user submits
- Using testID props on the element that would be accessed in the test suite
- The user can click the submit button after filling out the form
Test your application with Detox
With the Detox APIs, the test suite imitates actions similar to a real user interacting with the app. Replace the code below with what you have in your e2e/starter.test.js file:
describe('ShippingAddress', () => {
  beforeAll(async () => {
    await device.launchApp();
  });

  it('should have welcome screen', async () => {
    await expect(element(by.id('pageTitle'))).toBeVisible();
    await element(by.id('pageTitle')).tap();
  });

  // input phone
  it('should enter the Phone value', async () => {
    await element(by.id('phone')).clearText();
    await element(by.id('phone')).typeText('+1-202-555-0114');
  })

  // input shipping Address One
  it('should enter the Shipping Address One value', async () => {
    await element(by.id('shippingAddrOne')).clearText();
    await element(by.id('shippingAddrOne')).typeText('7262 Cactus Court Chino Hills');
  })

  // input shipping Address Two
  it('should enter the Shipping Address Two value', async () => {
    await element(by.id('shippingAddrTwo')).clearText();
    await element(by.id('shippingAddrTwo')).typeText('14 North Smith Ave. Riverside');
  })

  // input city
  it('should enter the City value', async () => {
    await element(by.id('city')).clearText();
    await element(by.id('city')).typeText('CA');
  })

  // input Zip code
  it('should enter the Zip value', async () => {
    // scroll to zip code input fied when hidden from the screen
    await waitFor(element(by.id('zipCode'))).toBeVisible().whileElement(by.id('scrollView')).scroll(50, 'down')
    await element(by.id('zipCode')).clearText();
    await element(by.id('zipCode')).typeText('92509');

  })

  it('should click the submit button', async () => {
    // scroll to submit button when hidden from the screen
    await waitFor(element(by.id('submitButton'))).toBeVisible().whileElement(by.id('scrollView')).scroll(60, 'down')
    await element(by.id('submitButton')).tap();
  });
});
Execute the test suites
In order to execute the test suite, ensure you’re in the project root.
After that, start the app with this instruction:
yarn start
Then, open a new terminal in the root of the app to build the app with Detox. To do that, run this command:
npx detox build -c android.emu.debug
After that, it’s time to execute the test cases using the following command:
npx detox test -c android.emu.debug

React Native, E2E testing, and Detox: Putting it all together
In the test automation pyramid, E2E testing is crucial to validate that the entire system behaves as intended and delivers a great user experience. The Detox test framework automates testing while accessing data and UI elements. With the help of tools like Appium or Detox, you can conduct E2E testing in your React Native app, boosting productivity and speeding time to market.


