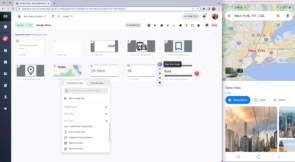
Appium Inspector is a tool for inspecting mobile application user interfaces (UIs) on Android and iOS platforms. It allows you to review and evaluate your mobile app’s elements (buttons, text fields, images, and so on) and see how they look on various devices. Appium Inspector also offers comprehensive details about each element, including its characteristics, hierarchy, and events that user interactions can trigger. You can use the information Appium Inspector provides to identify issues with the app, understand the UI elements, and improve its functionality. And since it’s available as part of the Appium server, you can integrate it into the Appium framework.
In this post, you’ll learn about the benefits of Appium Inspector and how to install it on Mac and Windows, launch it, and connect it to a server.
Expand Your Test Coverage
What is Appium?
Appium is a popular open-source tool for automating mobile app testing. It allows developers to write tests in multiple programming languages, including Java, Ruby, JavaScript, and Python. This makes it a versatile and flexible option for testing mobile apps on Android and iOS platforms. Appium also uses tools like Appium Inspector and the WebDriver protocol to inspect and communicate with the mobile app’s UI elements. In addition, it supports various test frameworks like JUnit and Cucumber.
Getting Started with Appium Inspector
While Appium Inspector might initially seem intimidating, it’s easy to use and has a friendly UI interface. However, before using Appium Inspector, you must have Appium installed on your system.
How to Install and launch Appium
You can download the latest version from Appium’s official GitHub page by following the installation instructions specific to your device. Launch it by opening the Appium server and clicking the “startServer” button. You’ll then have three options:
- Simple: This starts the server with the default host server address and server port.
- Advanced: This allows customization of the host server address, server port, and Chrome driver port.
- Presets: This uses preset values previously saved in the Advanced tab.
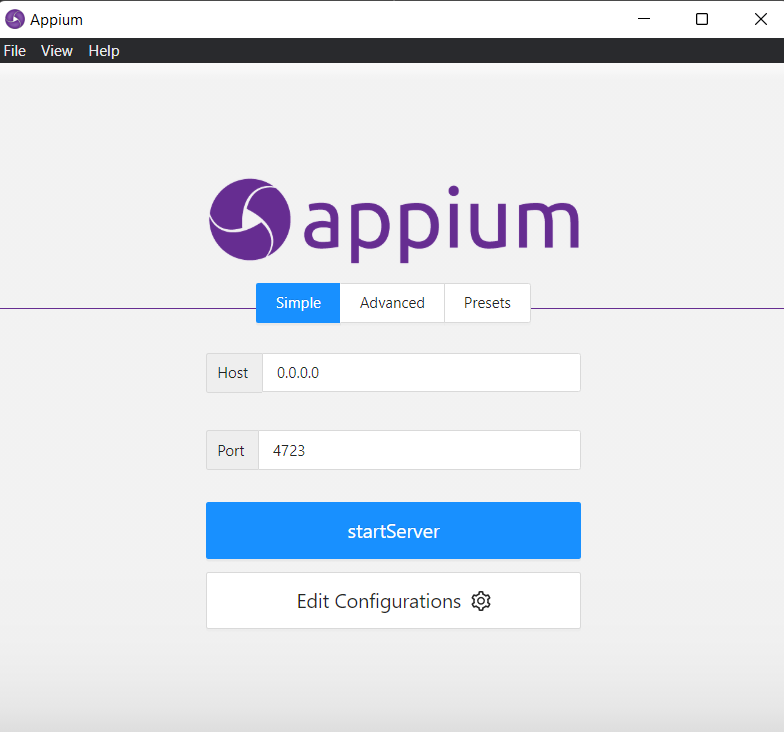 Now that you’ve installed and launched Appium, you’ll need to install Appium Inspector, launch it, and get started.
Installing and launching Appium Inspector
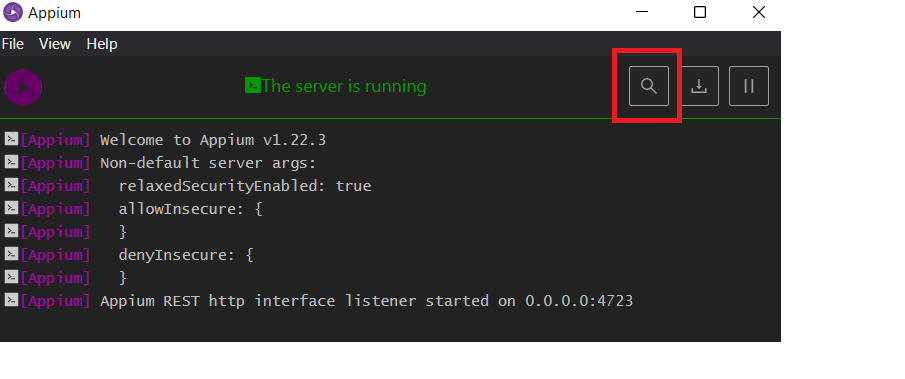
- Download Appium Inspector. Now that the server is running, click the “Search” button at the top right. It will direct you to the download link. You can also access it directly.
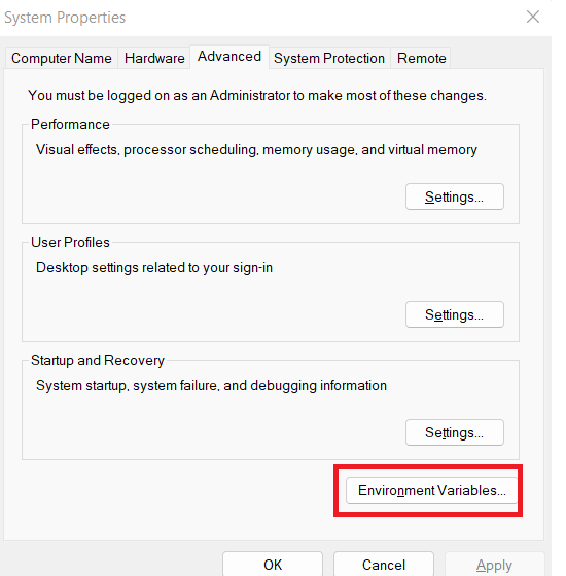
- Connect your device. To connect a device to Appium Inspector on Windows 10, enable USB debugging on the Android device and install the Android Debug Bridge (adb) by downloading the SDK platform tools on your PC. Then add the “adb” path to the Windows environment variables. Now open the command prompt and run “adb devices” to ensure the Android device is detected.
Launch Appium Inspector and set the remote host to 127.0.0.1 and the remote path to /wp/hub/.

- Set the Desired Capabilities. Desired capabilities in Appium refer to a set of keys and values used to configure the behavior of an Appium test session. These capabilities are passed as a dictionary or a JSON object to the Appium server when a new session is created. Some of the common desired capabilities include the following:
- PlatformName: The name of the mobile platform you’re going to test, e.g., Android or iOS.
- PlatformVersion: The version of the mobile platform you’re going to test.
- DeviceName: The name of the physical device or emulator you’re going to test.
- App: The path or URL to the app binary.
- AutomationName: The name of the automation engine you’re going to use, e.g., XCUITest for iOS or UiAutomator2 for Android.
- BrowserName: The name of the browser you’re going to use if you’re testing a web app.
You can find other desired capabilities in the documentation.
Exploring Appium Inspector’s Desired Capabilities
Take a look at an example of a use case for the desired capabilities. The JSON code below highlights the details of the connected device on which the test will be run and the application highlighted by appPackage and appActivity.
{
  "platformName": "android",
  "appium:platformVersion": "10",
  "appium:deviceName": "pixel-4",
  "appium:automationName": "UiAutomator2",
  "appium:appPackage": "com.android.contacts",
  "appium:appActivity": "com.android.contacts.activities.PeopleActivity"
}
The screenshot below shows the dictionary and JSON view in Appium.

To use this JSON code, have your device or emulator connected or running with the application you want to test.
The Contacts app was used as an example in this case. To get the name of the app package and activity, open the required app on your Android device and run the following command in the command prompt: adb shell dumpsys window | find “mCurrentFocus.
The screenshot below shows the expected result.

Here is a step-by-step guide.
- Start an Inspector session. Once the Appium server runs, you can start a session by clicking the “Start Session” button.
- When the session starts, you can inspect elements by clicking them in the Inspector window. You should see the properties of each element displayed in the right panel. As an example, the screenshot below shows the properties of the “Add Account” button that was selected.
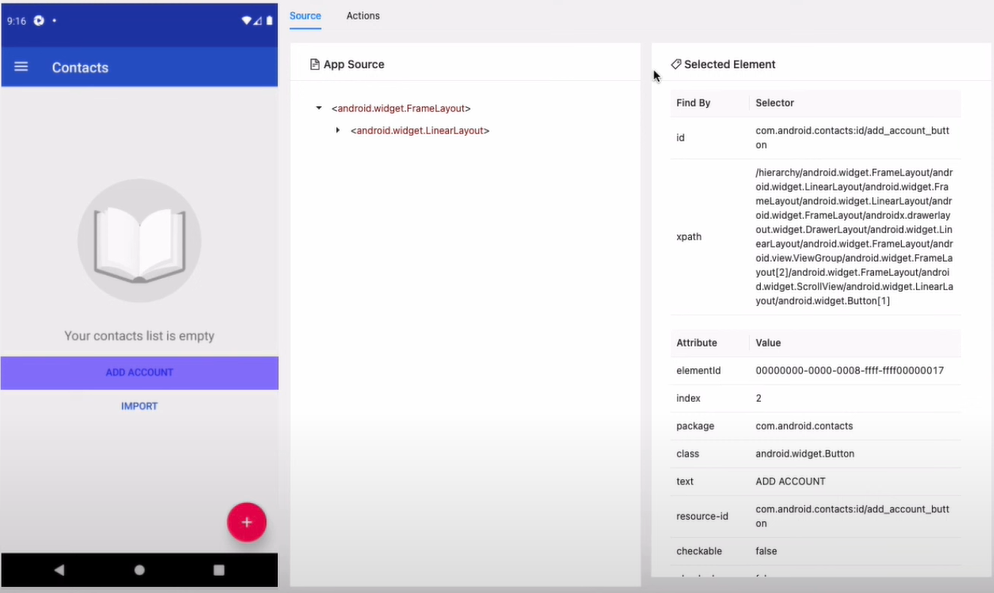 Now inspect the elements. Below are some of the things you can do.
- Remote element inspection on various devices: The Appium inspector supports element inspection on remote devices from popular cloud vendors like Kobiton, Saucelabs, TestObject, Headspin, BrowserStack, Bitbar cloud, and more.
- Custom Appium server inspection: You can inspect elements on any custom Appium server by providing the remote host IP address, port, and path under the “Custom Server” tab.
- Attach to existing session: The inspector allows you to easily attach to an existing Appium session by providing the session ID.
- Reverse element search: Appium Inspector supports searching for elements on the UI using its locator.
- Script recording: The Appium Inspector session provides script recording functionality to save you time.
- Perform various actions: The Inspector offers various actions you can perform on elements. These actions include swiping, tapping on coordinates, and more.
- Best locator suggestions: Appium Inspector can suggest the best locator strategies, such as ID, accessibility ID, class name, or XPath for easier and quicker element identification.
- XML structure: You can get the XML structure of all visible elements on the screen with Appium Inspector.
- End the session: When you’re finished inspecting the elements, click the “End session” button.
Benefits of Using Appium Inspector
Appium Inspector provides many benefits to testers and developers who want to inspect and analyze the elements of their mobile apps.
Some of its key benefits include the following:
- Easy inspection of app elements: Appium Inspector provides a visual interface for inspecting and analyzing your app’s elements, making it easier to identify issues or areas that need improvement. This also flattens the tool’s learning curve.
- Detailed element information: The inspector displays detailed information about each element, including its properties, hierarchy, and events that user interactions can trigger.
- Improved app functionality: By using Appium Inspector to identify issues and make improvements, you can improve its overall functionality and user experience.
- Time-saving tool: Appium Inspector saves time and effort by automating the inspection and analysis of app elements. This allows testers and developers to focus on other aspects of the application development work.
- Cross-platform compatibility: Appium Inspector works across multiple platforms, including iOS and Android, making it a versatile tool for testing and development.
- Integration with the Appium framework: Appium Inspector is integrated with the Appium framework, making it easy to use and access as part of your testing and development workflow.
Conclusion
Appium Inspector is a fantastic tool for automating mobile app testing, especially as it allows testers to identify and interact with UI elements reliably. Whether you’re working with genuine devices, simulators, or emulators, the Appium Inspector tool provides the valuable information you need to write effective test scripts.
It’s crucial to keep in mind that only native mobile applications are compatible, and it doesn’t help you discover locators on web browsers like Chrome. It can also be slow, especially when working with large and complex apps. That’s why tools like Testim come in handy, which testers can use to streamline their test processes, improving their testing efforts’ overall efficiency and accuracy. Give Testim a try!


